In our previous post, we introduced machine geometry as a common "language" for machinists and metrologists to discuss precision alignment challenges. Defining machine components in terms of geometry allows each party to use terms and concepts everyone can understand.
Here we discuss how simple geometric entities help define which components to measure and how to characterize them. Machines often have multiple features governing the alignment process, some of which include:
| Keyways | Bore Centerlines |
| Frames | Rolls |
| Drive Shafts | Sole plates |
Linear Applications
When industrial processes are represented by the basic geometry of a line, straightness is typically the characteristic being measured. Perhaps machine elements must travel in a linear path or a set of journal bearings define a central axis. Either way, the requirement for colinearity of these components would suggest that an optical alignment telescope be used.
 |
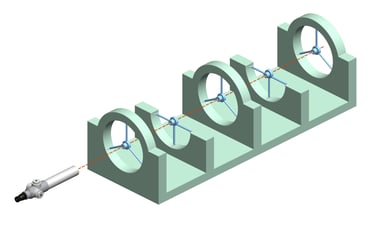
| Alignment telescope sighting engine bores for straightness. |

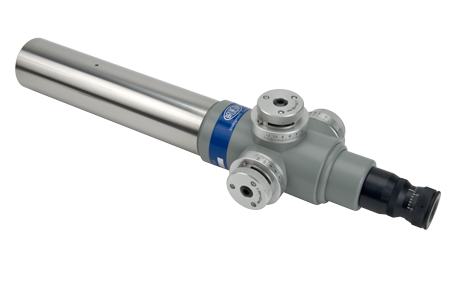
The alignment telescope has two micrometers to measure precise horizontal and vertical offsets perpendicular to the line of sight. If a gravity reference is required, a stride vial can be used to establish a level line of sight.
The basic idea is to position the instrument so that its line of sight is collinear with the desired reference line. The instrument is positioned using reference targets seated against the linear guide or at the near and far ends of the bore centerline. With a reference centerline established, we can measure straightness by inserting a target at intermediate positions along the linear guide or bore.
Here are a few applications requiring straightness measurements:
- gas compression engine and extruder bores
- turbine diaphragm alignment
- turbine/generator centerlines
- wicket gate bores in hydro power generation applications
- hinge lines in aircraft fixtures
- marine drive shaft rotational centerlines (propeller shafts) and bores (stern tubes)
- particle accelerator beam line
- machine tool travel and spindle centerlines
Everyone easily understand the alignment requirements when complex mechanical systems are described in simple geometric terms. Contact us if you need help implementing or planning an alignment solution for your industrial process equipment.
Want to know more about Machine Geometry? Read our first post on the topic here.


