Proper alignment is a core requirement for industrial processing equipment. In this blog series, we are learning to speak the "language" of machine geometry to bridge the communication gap between machinists and metrologists. By representing components as geometric entities, we clarify the alignment requirements and define which instrument is best suited for the task.
Planar Applications
Many alignment challenges require setting a machine surface in a specific orientation. For example, sole plates and machine bases must be level. Mill stands and vertical ways must be plumb. Portable mill rails and deck pads have precise flatness callouts. Surfaces like these are often characterized by a plane and set the primary datum for additional machine components. Effective devices for establishing level, plumb, and flat (non-level) planes are precision sight levels and jig transits.
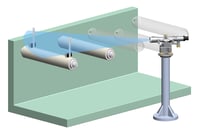 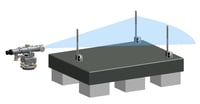 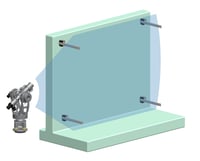 |
| Left and center: A precision sight level checks rolls for level and a surface table for flatness. Above right: A jig transit sets a machine surface plumb. |
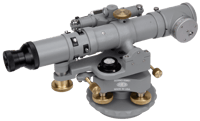
A Precision Sight Level (545-190) sweeps level and flat planes.
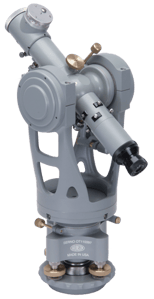
A Jig Transit (771-H190) sweeps horizontal (level) and vertical (plumb) planes.
Precision sight levels are optimized for sweeping horizontal planes that are precisely level by using a built-in split-bubble vial. (It can also sweep non-level planes if desired.) Once the instrument is set to sweep the desired plane, scales are mounted in various positions on the machine and readings taken to determine how level (or flat) the surface may be. Machine adjustments are made by watching the scales with the level, providing immediate feedback to the person doing the adjustment.
Making things vertical is almost as easy as making them horizontal. To do this job, however, we use a transit rather than a level. We set the vertical spindle of the instrument perfectly vertical – as in “exactly parallel to gravity”, not just pointing generally “up and down”. Once we do this, we know that the telescope will rotate through a true vertical (plumb) plane, regardless of what azimuth (horizontal) direction that plane is oriented. Common planar measurements include:
- sole plates
- thrust bearings for turbine shafts in hydroelectric applications
- machine ways, horizontal and vertical
- engine frames
- carriage rails
- machine ways on portable mills
- swing racks and deck pads on dragline excavators
- rollers of all sizes
- aircraft and automotive fixtures
Learn more about how planar measurements can guide the installation
and inspection of machine components by visiting our knowledge base.
Want to know more about Machine Geometry? Read the rest of the series by clicking one of the links below:
Understanding Machine Geometry and Alignment
How to use Simple Geometry to Align Machines with Optical Instruments – Part One
